
Breeze is the perfect caching plugin for WordPress, offering powerful performance optimization options at every level. It’s simple to set up and easy to use, making it the perfect solution for busy WordPress administrators.
Breeze is compatible with WooCommerce and Multisite, so you can get the most out of your WWooCommerce ordPress site. With Breeze, you’ll enjoy faster page loading times and a better overall user experience.
Breezer Installation
To install the plugin via WordPress Dashboard
1. In the WordPress admin panel, Menu > Plugin > Add new
2. Search for Breeze
3. Click on install and wait for the installation to finish. Next, then click on the activate link
To install the plugin manually
1. Download and unzip the plugin package – breeze.1.0.0.zip
2. Upload the /breeze to /wp-content/plugins/
3. Activate the plugin through the ‘Plugins’ menu in WordPress
4. Access Breeze from WordPress Admin > Settings > Breeze
Configure Breeze Plugin
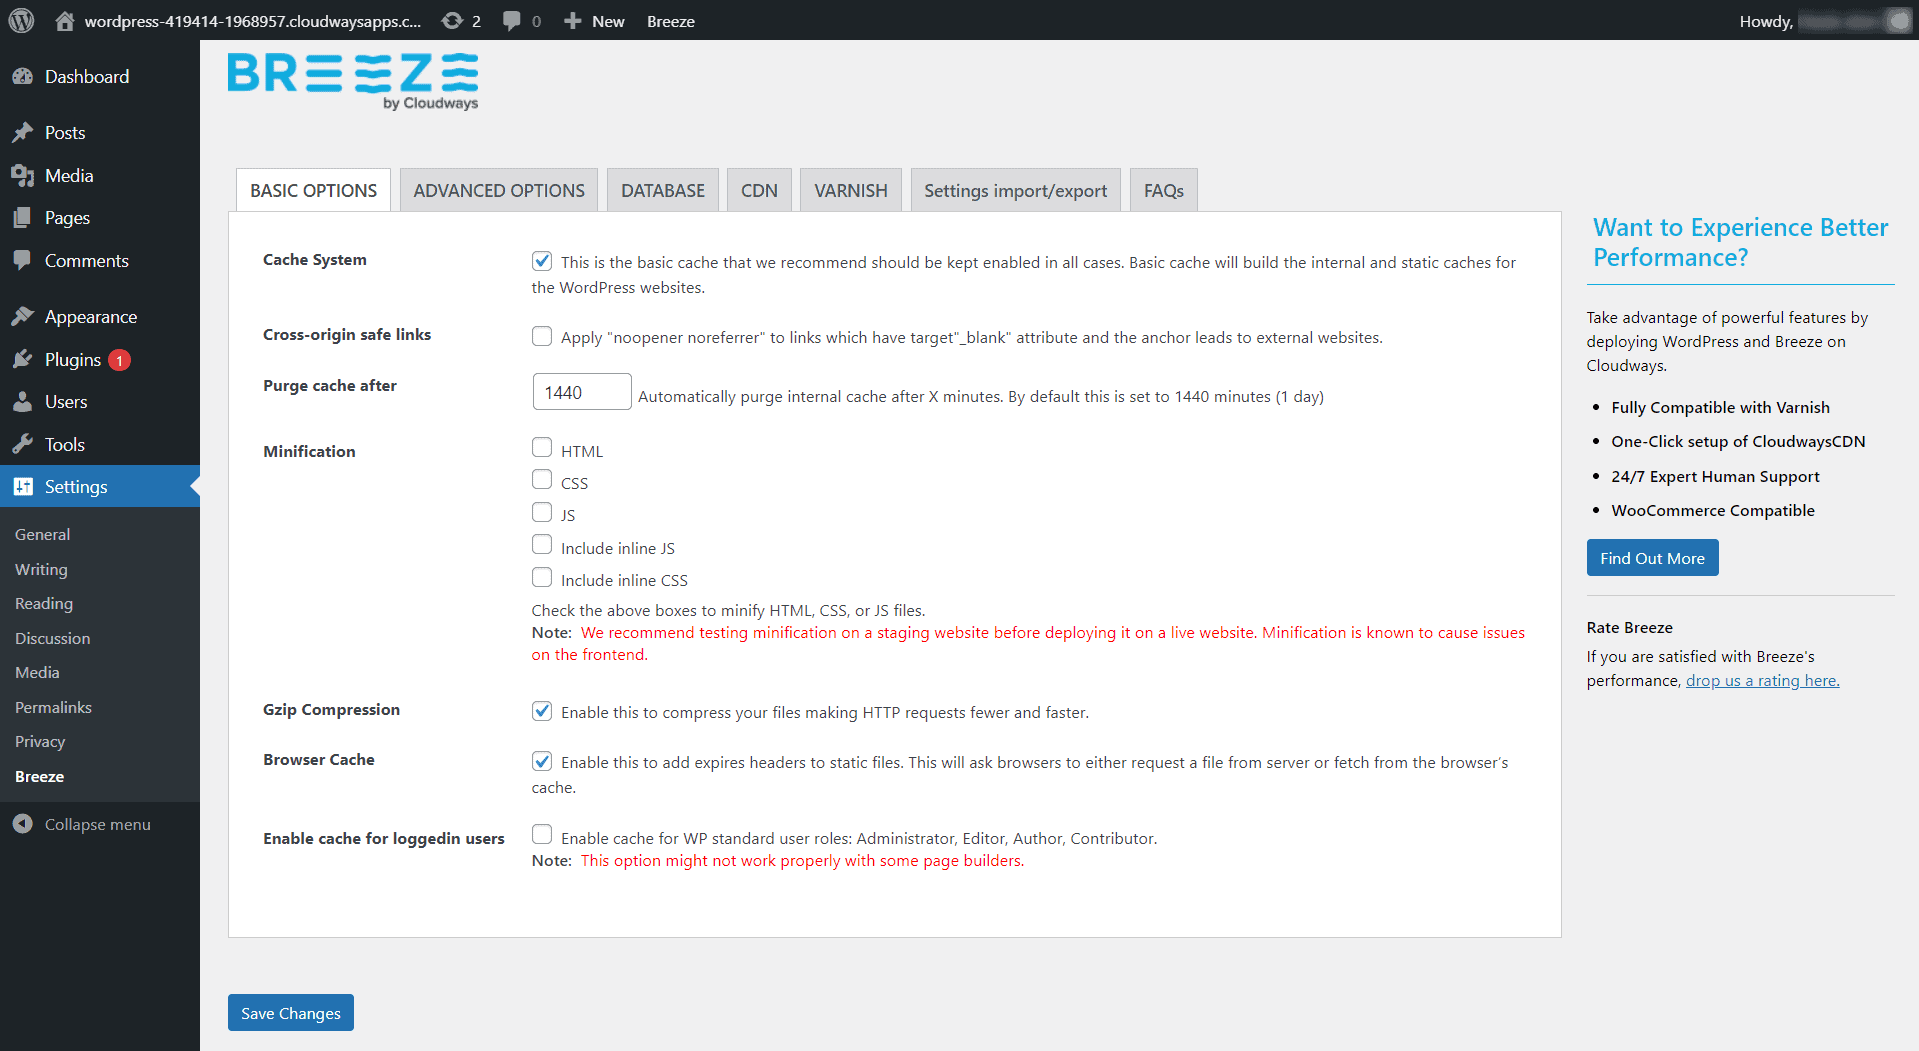
Navigate to Breeze settings by clicking Settings > Breeze.

On the control panel, you will find 5 tabs which are labeled as basic, advanced, database, cdn and varnish.
Basic Options
Purge cache is set to 1440 minutes (24 hours) by default.
Minification, it is recommended to keep it unchecked unless it’s necessary.
Keep the GZIP Compression option enabled. You can uncheck this option if you have already enabled GZIP compression on the server through other means
Advanced Options (Optional)
Add the URLs that you may want to exclude specific from the plugin’s cache in the Never Cache these URLs field. (Note: If Varnish is enabled on your Cloudways Platform, we suggest excluding the URLs from the Varnish as well.)
If you are using modification in the basic option, you may select CSS and/or JS under the Group Files
Follow the screenshot if you want to exclude certain CSS and JS from minification and grouping.

Query Strings Caching
The query string is a part of a URL attached at its end. It assigns the values to the defined set of parameters that helps to identify particular actions or content based on the data being passed.
Ignored Query Strings
Breeze does not cache query strings by default. Therefore, it ignores the links with query string and serves the standard cache file for all the parameters available below:
URL 1: example.com/services/?utm_medium=socialmedia
URL 2: example.com/services/?utm_medium=blog

Here, both URLs will receive one standard caching file, such as:
example.com/services/
Include Query Strings in Caching
If you want to enable caching for a few specific query strings, you need to define those in the Cache Query Strings available under the Advanced Options.
Breeze will generate a dedicated cache file against each value the parameter country receives in a URL. If multiple parameters in a URL with at least one of your defined parameters is present, the page will be cached.
For instance, you wish to cache the “country” query string.
http://example.com/page/?country=germanyHere, “country” is the parameter, and “germany” is its value. Therefore, in Cache Query Strings, add “country”.
Dedicated Caching for Few Query Strings
Breeze serves a dedicated cache file for the following query string parameters.
- lang
- permalink_name
- lp-variation-id
URL 1: example.com/services/?lang=english
URL 2: example.com/about-us/?lang=german

Here, both URLs will have dedicated caching file for their parameter/value pairs:
?lang=english
?lang=german
Database Optimization
Set it according to you requirements. Database optimization options include Post revisions, Auto drafted content, trashed content, comments from trash and spam, trackbacks and pingbacks, and transients.

CDN (Optional)
- CDN Root URL: Here, you can specify the URL of CDN that you are usingIf you have some pages on HTTP and some on HTTPS, you should begin the URL with a double slash ‘//’ (e.g.,//www.cdnrooturl.com).
-
CDN Content: Enter the subdirectories for which you want CDN to serve content.
-
Exclude Content: List the content you want to exclude (static content such as CSS/JS/images) from CDN.
-
Relative Path: We recommend that you keep this option enabled. This will enable the relative path for your website.

Varnish Options
By default, Varnish is enabled on all fresh WordPress deployments. We recommend that you keep the Auto Purge Varnish option enabled

Settings Import/Export
It is used to import and export your Breeze configurations using the WordPress Admin Panel or WordPress Command Line Interface (CLI).
Export Configurations
If you want to export your Breeze settings, click Export JSON. The configurations will be downloaded in a .json file on your local computer.
Import Configurations
Similarly, if you already have Breeze settings in the .json file, you can import them by clicking Select JSON File and navigating to the file available on your local computer. Next, click Save Changes.

Details of How Breeze Works (caching)
Caching speeds up your site by generating HTML pages for your visitors’ browsers to display, rather than serving them the more labor-intensive process of dynamically generating content on each page load. This drastically reduces the processing demands on your server. If a visitor comes back to your site, they’ll see a page served from cache rather than needing to wait for WordPress to generate the page.
With Breeze you can use any of the following types of cache:
1. The default option is file-based caching which speeds up your site by storing PHP code as files on your server. This re-uses the cached code and saves you having to regenerate it.
2. The second option is object caching, which stores SQL queries and their results in a static file. The next time that page is loaded, Breeze will serve the static cached version instead of running the query on MySQL.
This is much more efficient than using server memory or a flat file because it’s much faster to access a cached object than a database.
3. The final option is page caching, which stores the whole HTML output of your page so that subsequent visitors get served the static version instead of WordPress having to generate it dynamically.
This results in far better performance than any other caching method because only one request gets sent to WordPress, rather than thousands for every page load.
What is Cloudways?
Cloudways is a cloud hosting platform that offers you the best technologies and resources to manage your website at its best.
We offer a wide range of features that cover all aspects of hosting, from complete server management with SSH access, Git integration and staging environments to custom email configurations.

You can also take advantage of our Plugin Marketplace for WordPress websites to install popular plugins that are not directly available in the WordPress CMS.
Cloudways is quite different from other hosting providers because it offers affordable rates along with high-end cloud infrastructure and server management. You don’t need to worry about scaling your website, as you can upgrade or downgrade servers seamlessly on demand. We also offer free migrations for all our new users.
Cloudways provides you with an easy platform to deploy websites and apps on the cloud quickly, so you can get your business online without any hassle.
With Cloudways, you have more control over your website’s resources than you would with other hosting providers, plus our platform is user-friendly and easy to use. Plus, we offer SSL certs support to keep your data safe and secure.
Managing multiple servers is a breeze with Cloudways Server Management features – all integrated into one section of our user-friendly interface.
The Cloudways platform offers you the flexibility of choosing the server location for your website, where you can check the latency statistics of any particular region or select one that is closest to your target audience. We offer optimized server configurations for WordPress, Magento, Drupal and Joomla! websites so you can achieve maximum performance with each website that you host on the Cloudways platform.
Cloudways Pricing Plans

First Plan:
- Cost $10 per month.
- 1 GB RAM.
- 24/7 expert support.
- Storage is around 25 GB.
- You can install unlimited applications.
- Free SSL certificates and free migration.
- Automated Backups.
- Processor – 1 Core
- Auto Healing
- Regular Security Patching
Second Plan
- Cost $22 per month.
- SSH and SFTP access
- Feature of Team management.
- 24/7 support within 365 days.
- Free SSL certificate in this plan.
- Staging environment with automated backup
- Free Migration
- You can install unlimited apps.
- 2 GB RAM and 1 Core Processor.
- Do you know you will get 50 GB storage with 2 TB Bandwidth?
- Updated and regular security patching is offered to all users.
Third Plan
- Cost $42 per month.
- Most Popular Pricing plans are offered by Cloudways.
- 4 GB RAM and 2 Core Processors.
- 80 GB Storage and 4 TB Bandwidth.
- Free SSL and Free Migration.
- Dedicated Firewalls.
- Automated Backups.
- Optimized with Advanced Caches.
- SSH and SFTP Access.
- CDN Add-on.
- 24/7 Customer help desk.
Fourth Plan
- It costs $80 per month with 8 GB RAM, which is an amazing benefit. You know when you have high GB RAM, your sites never hang.
- One more super amazing benefit- 160 GB storage and 4 Core Processor, with 5 TB Bandwidth. I think no other web hosting server can offer this much bandwidth in any of their plans.
- Dedicated Firewalls with super amazing customer desk which is available 24/7 hours in all 365 days.
- All plans include Free SSL Certificate and Free Migration.
- I have installed numerous applications in this plan, as it offers a high GB Ram and High storage.
Quick Links
Conclusion : How To Install And Configure Breeze WordPress Cache Plugin 2024
To summarize, you need to install and configure the breeze WordPress cache plugin. This will ensure that your website is performing at its best for both visitors and search engines alike.
You can use this blog post as a guide if you are unsure of how to do so. We hope these instructions have been helpful! If they weren’t, please let us know! Our team would be more than happy to help troubleshoot any issues or answer any questions about installing the Breeze WordPress Cache Plugin on your site.